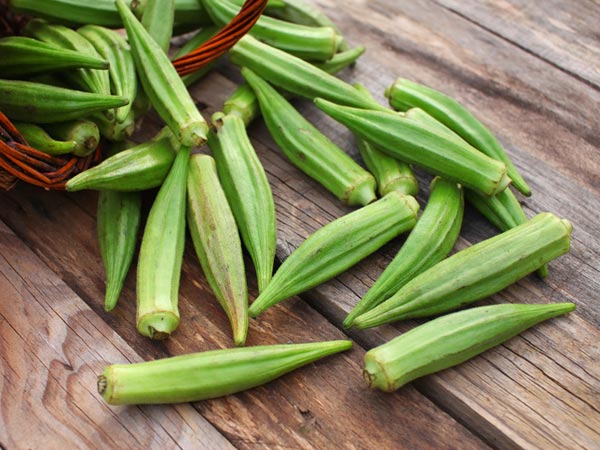
Growing Okra
As more gardeners discover that they really like okra, the range of this warm-natured hibiscus cousin is steadily edging northward. Growing okra requires warm weather, but by using seedlings, you can shave 3 weeks or more from its usual long season. As long as okra seedlings are handled gently, as if they were breakable eggs, they can be slipped into the garden – or into large containers – just as the hot season begins. For the best results, begin with vigorous okra starter plants from Bonnie Plants®, the company that has been helping home gardeners succeed for over a century.
Quick Guide to Growing Okra
- Plant okra in hot weather when evening temperatures are in the 60s or warmer.
- Space okra plants 10 inches apart in a very sunny area that has fertile, well-drained soil with a neutral pH of 6.5 to 7.0.
- Improve native soil by mixing in several inches of aged compost or other rich organic matter.
- Okra loves the heat and can withstand a dry spell, but do your best to give plants 1 inch of water every week.
- Promote a more abundant harvest by regularly feeding with a continuous-release plant food
- Harvest okra pods when they are 2 to 4 inches long.
Soil, Planting, and Care
Choose your sunniest spot for growing okra, and wait until the weather is warm to set out your plants. Plants like it when nights are at least in the 60s and days 85 or warmer. In the North, gardeners might wait until late June to plant, since pods appear within 2 months.
Okra grows best in soil with a near-neutral pH between 6.5 and 7.0, although it will do fine in a pH as high as 7.6. Plants benefit from a generous amount of compost or other rich organic matter, which should be thoroughly mixed into the soil before planting. Or, you can improve the nutrition and texture of your native soil by mixing in aged compost-enriched Miracle-Gro® Performance Organics® All Purpose In-Ground Soil with the top few inches. For an even better chance at a big harvest, you’ll also want to make sure your okra plants get all the nutrients they need throughout the season by feeding them with a continuous-release fertilizer such as Miracle-Gro® Performance Organics® Edibles Plant Nutrition Granules, following label directions.
Okra seedlings have fragile taproots that you need to be careful not to damage. Thoroughly water your seedlings an hour before you plant them. Gently remove them from the pot, separate the seedlings, and set them about 10 inches apart. Plant slightly deeper (about ½ inch) than they grew in their pots. Water the little plants if rain is not expected, but wait a few days before mulching to give the soil a chance to absorb the sun’s warmth. Okra is appreciated for its ability to withstand drought compared to other vegetables, but for good growth and production, you’ll need to water at least an inch a week, just as with other vegetables. Just know that if you run into an extended dry period and can’t seem to water enough, okra will be the last to suffer.
The early growth of okra is often slow, but the plants grow much faster once summer starts sizzling. In addition to gaining height, okra’s leaves get bigger as the plants grow and begin producing yellow blossoms followed by tender pods. Plants are erect with a main trunk, making them look a little tree-like in the garden
Troubleshooting
Cool weather is okra’s number-one enemy, and stressed plants may fall victim to verticillium and fusarium wilts, which are soil-borne diseases that cause them to wilt and die. Another serious pest is root knot nematode. Ants often climb up plants to steal sips of nectar but seldom cause serious damage. Fire ants are the exception, as they can cause damage to developing flowers that forces them to abort. Other pests that you may run into include Japanese beetles, stink bugs, aphids, corn earworms, and flea beetles. Contact your regional Extension agency for details on how to control these diseases and pests.
Harvest and Storage
Warm weather helps pods grow quickly, so check plants every day once they start producing. A pod can grow from nothing to full size in 2 or 3 days. Pods first appear at the base of the plant up so that by the end of the season you could be on your tiptoes to harvest.
Pods are ideal when 2 to 4 inches long; they get very tough and stringy if allowed to stay on the plant. Always remove any that are too big to eat because they keep the plant from producing.
Use pruning shears to cut the pods with a short stub of stem attached. Some people suffer uncomfortable itching from contact with okra’s stiff leaf hairs, so you may want to wear gloves and a long-sleeved shirt when gathering your okra. If a few pods slip by you and grow into giants, cut them off to keep them from exhausting the plant.
In warm climates where summer lasts a long time, standard-sized plants can get 6 to 8 feet tall. In this case, many people prune in late summer by cutting back about one-third of the plants’ tops. Buds along the main stem then grow and produce a late crop.
Okra is a “cut-and-come-again” vegetable. Keep cutting the pods every day or two, and they will keep on coming.


